Unreal Engine
Before you begin
Ensure that you are on Unreal Version 5.2 or later (Earlier versions will require you to build your own version of the plugin from our base sdk code) The base sdk is available upon request.
In your Projects base folder create a Plugins folder (if it does not already exist). In that folder create a TwitchSDK folder then unzip everything contained in UnrealTwitchSDK.zip
Note: If you place the plugin into the base Plugins folder but do not create a subfolder for the Twitch plugin, Unreal will not correctly generate the sln file and you will get errors when trying to add the TwitchSDK module.
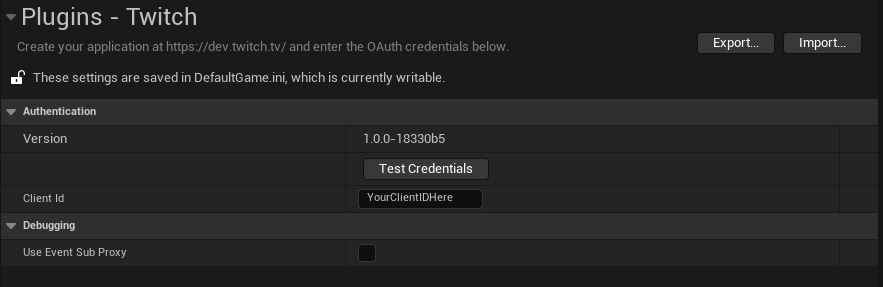
You must configure the settings for the plugin in your project settings.
If you plan on using C++ at some point in the future please refer to our Unreal C++ Guide as there are some initial steps you must do to call the plugin directly from code.
Authentication
Authentication can be done at any point in your game, we generally suggest doing so on either the main menu or from an options screen.
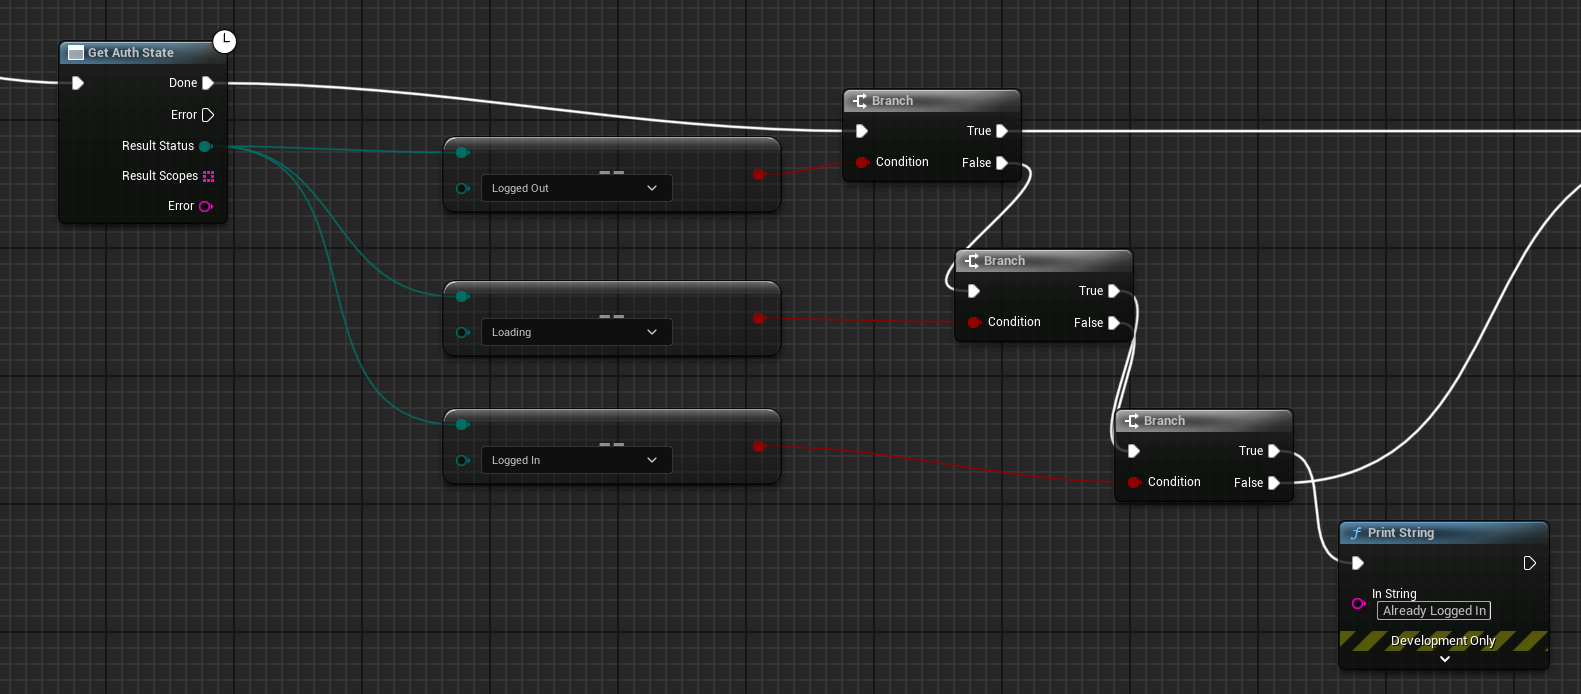
First you must call the get Auth State node in the Event Graph, from there check the status enum to determine the current state of the user.
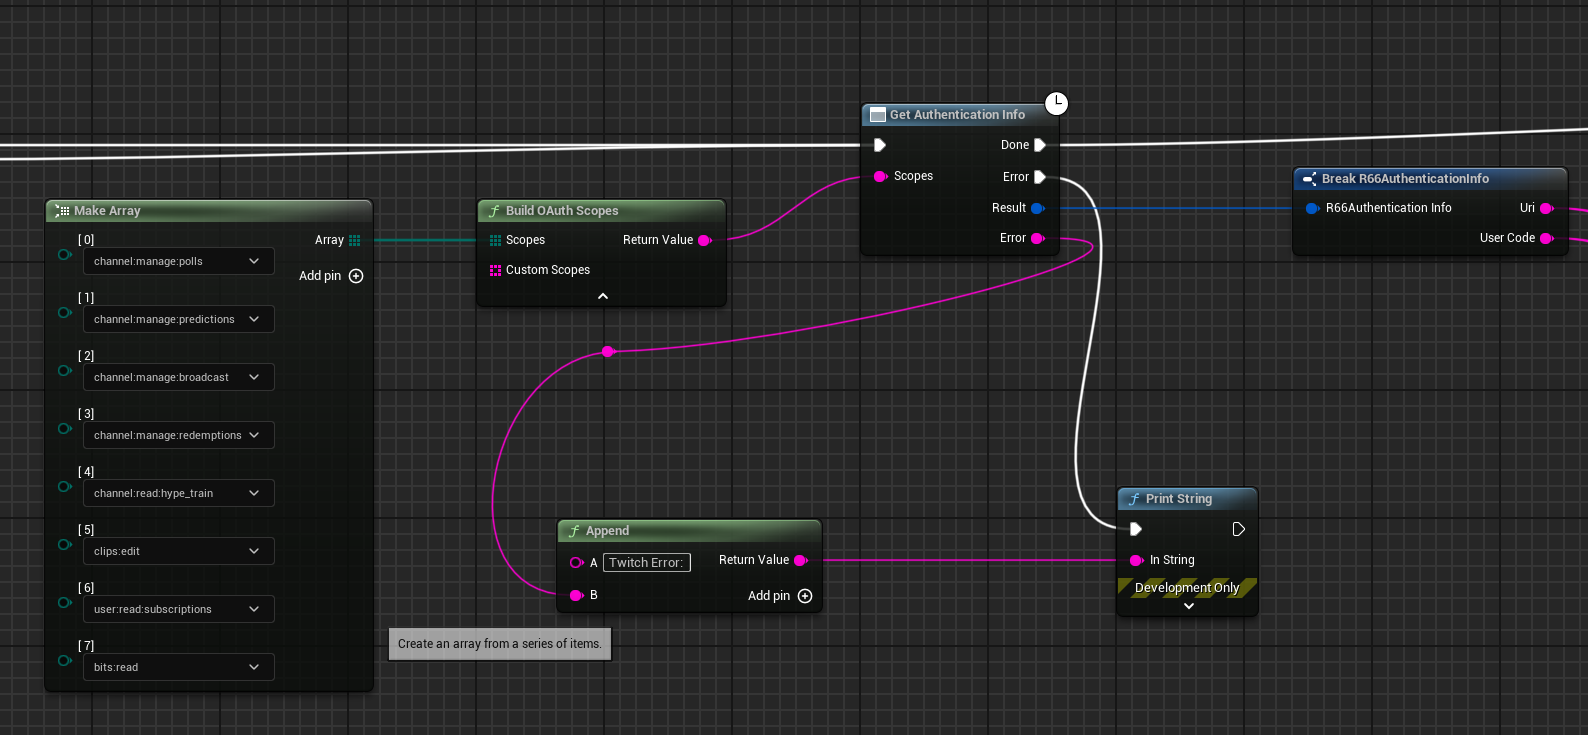
Next create a Build OAuth Scopes node. Pull off the Scopes input pin and Make Array via right clicking. From there the plugin will automatically populate the scopes array, you can add more scopes to this array by clicking the Add Pin button.
Note, only add in each scope once.
Pop the return value from the Build OAuth Scopes node into a Get Authentication Info node.
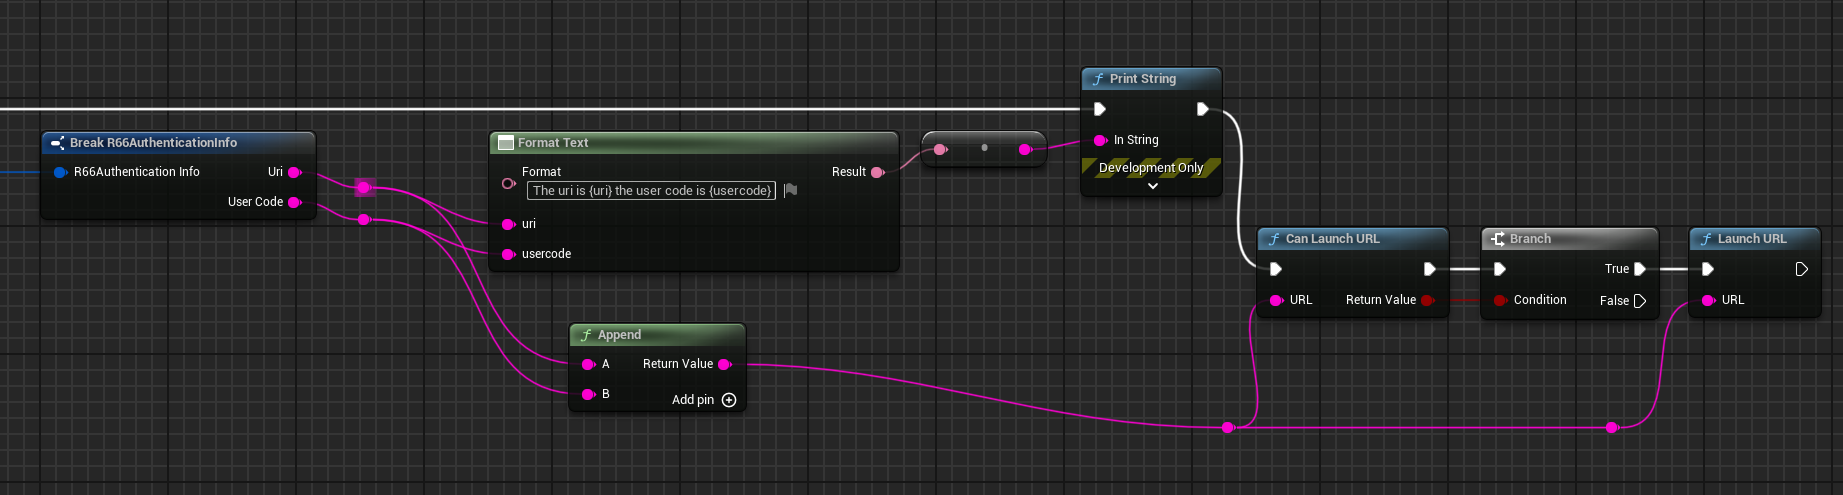
Pull off the Results pin in Get Authentication Info and call Break Authentication Info
The result of this will give a URI and a user code. You would from this point either directly launch a browser with the URI for the user or you would show the location to the user from them to type themselves.
Example Flow:
Polls
Polls require the user to be logged in and the appropriate scope.
To create a new Poll you must call the Create Poll node. This node is special in that it is a Latent node type.
Latent nodes are nodes which will finish their execution at a later point in time, this allows for slow responses from our system to not bog down your game state.
This node takes in a string array of choices, a title, a duration, vote costs and voting type bools.
Only Title and Choices are required.
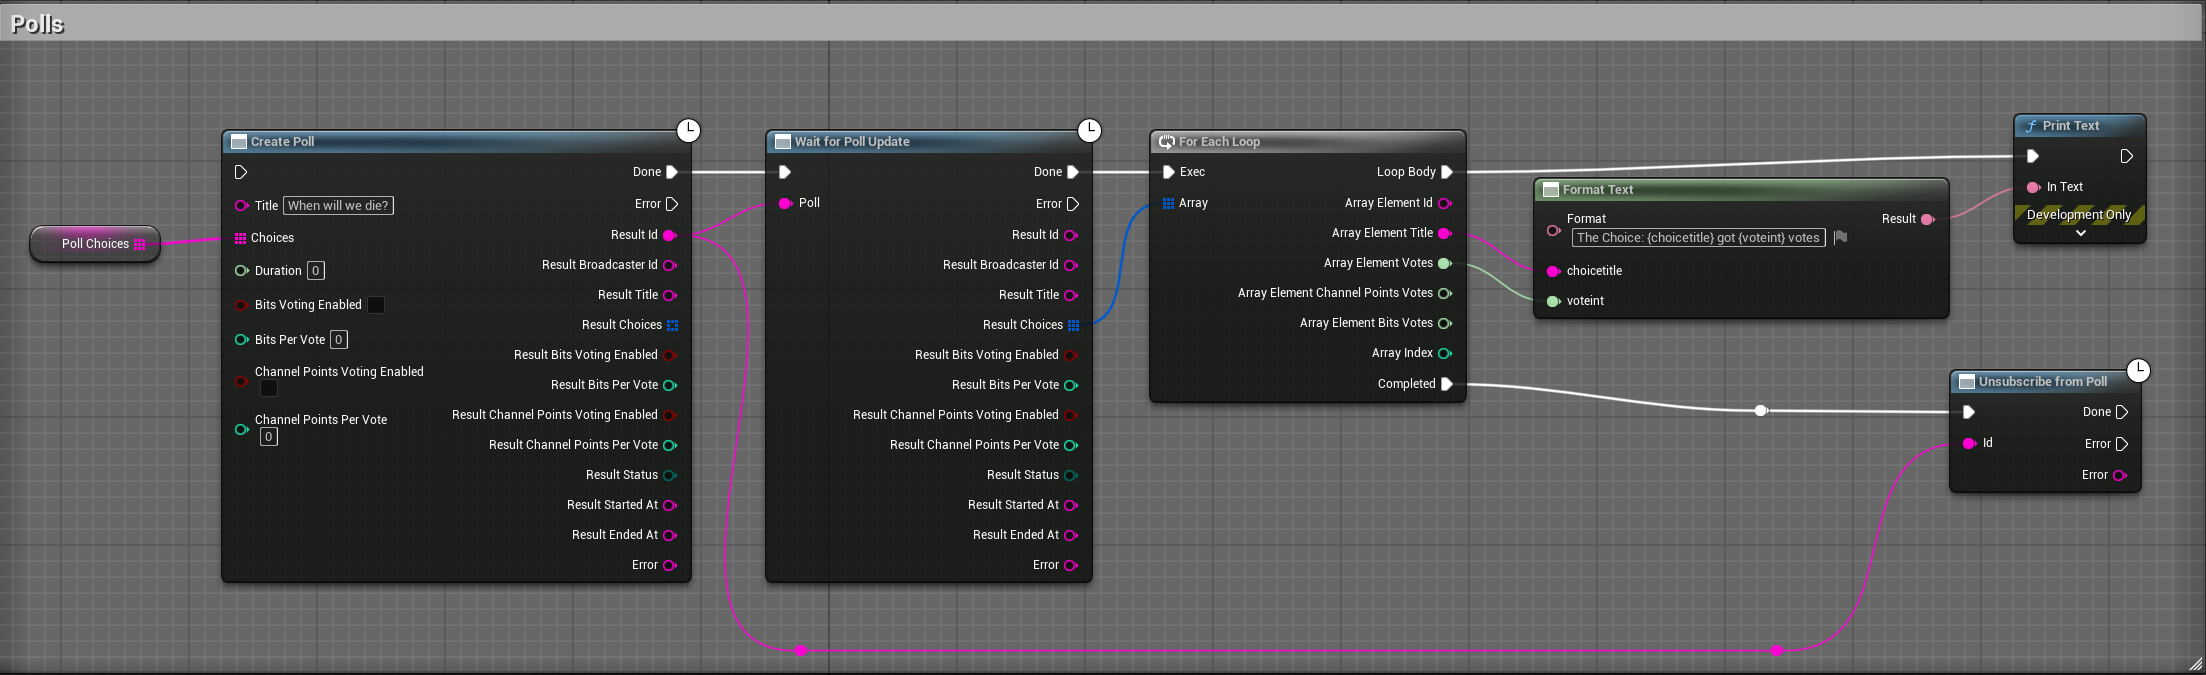
Pull off the Done pin of the Create Poll node and call Wait for Poll Update.
Wait for Poll Update takes in a Poll ID, you can get this from the result of the Create Poll node.
Pull off the Done pin of the Wait for Poll Update node and do a For Each through the Result choices array.
Finally pull off the Completed pin and call the Unsubscribe from Poll node.
Example Blueprint:
Predictions
Predictions requires the user to be logged in and the appropriate scope. Predictions function much in the same way as Polls, however their main difference is in the amount of choices. Where Predictions expect two choices, Polls can have multiple.
To create a new Prediction you must first create a string array of the possible outcomes for the prediction. Pass that array into the Create Prediction node.
This node takes in a Title of type string, an array of choices of type string and a duration of type int. Title and choices are required to create a new Prediction.
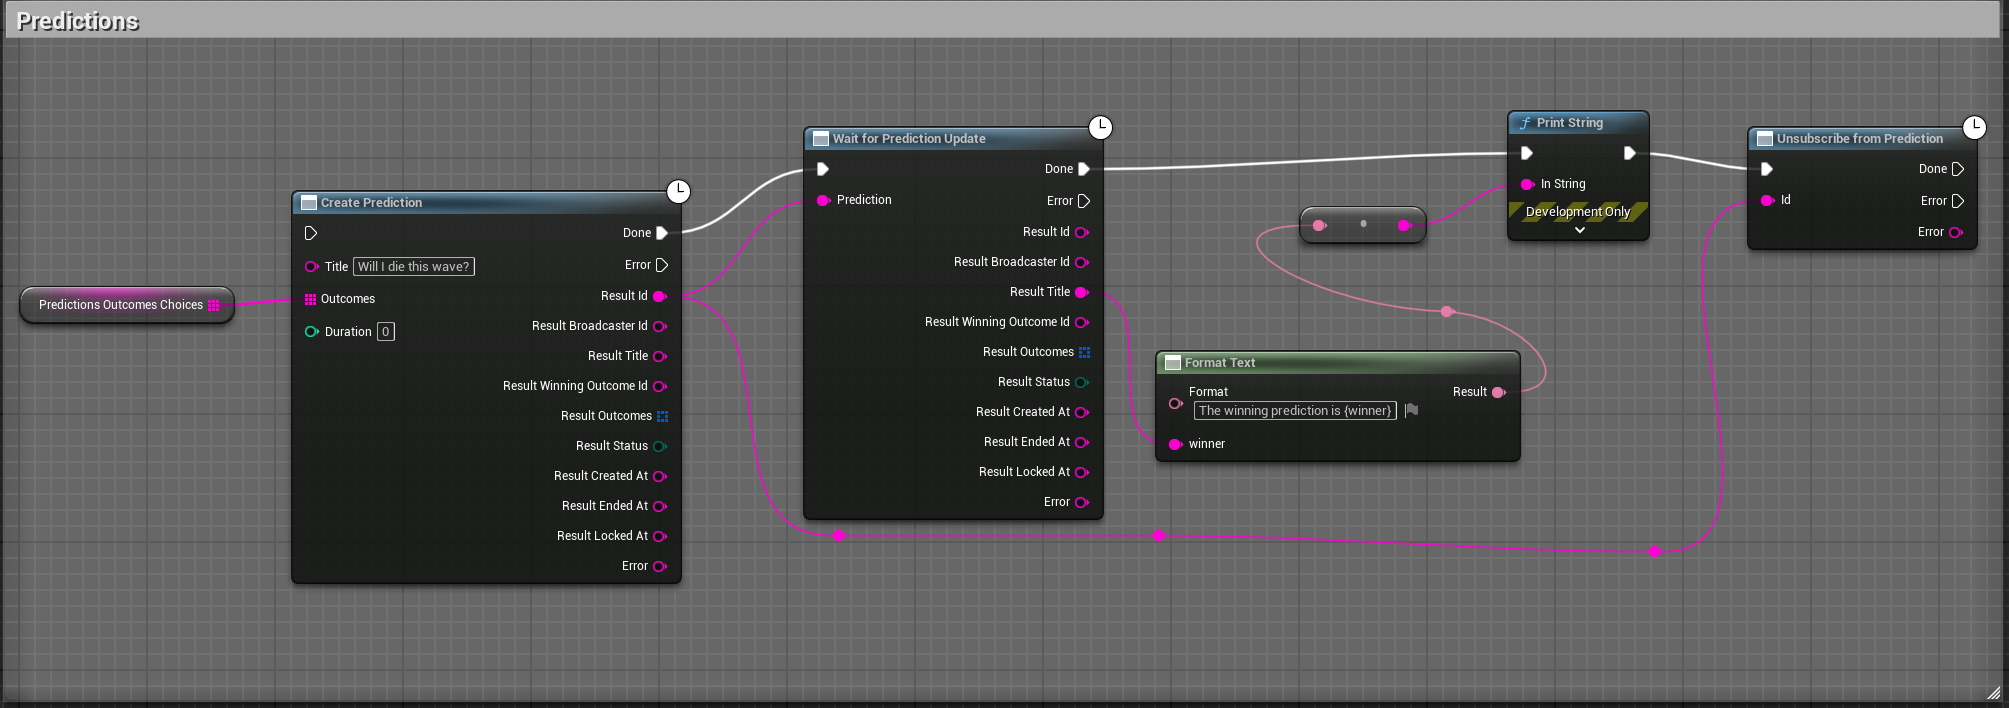
Pull off the Done pin of the Create Predictions node and call Wait for Prediction Update, pass in the Result ID from the Create Prediction node.
From there you can use the Result Title and Result winning Outcome ID to determine which choice was predicted to be won by the community.
Example Blueprint:
Channel Points Rewards
Utilizing Channel Points rewards must be done in two steps.
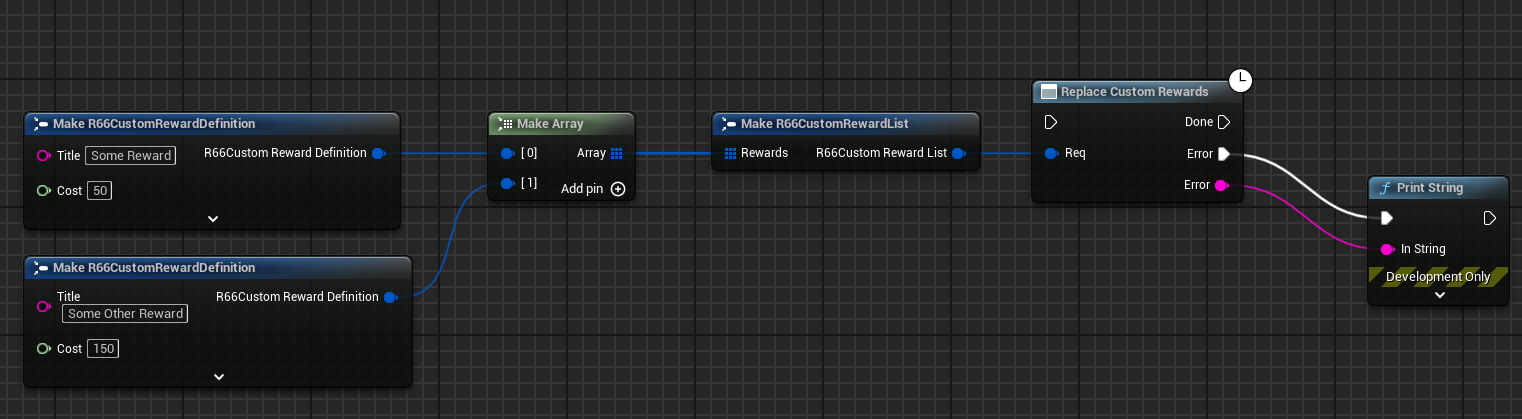
The first step is to create the rewards themselves. This can be done via the Make CustomRewardDefinition node. Each Channel Point reward has a string title and a interger64 cost.
The channel point rewards must then be popped into an array, this can be easily done via the Make Array node. Once the array has been created call the Make CustomRewardList node, pull off the CustomRewardList pin and call ReplaceCustomRewards.
Step 1 Example:
At this point you are ready to move onto step 2.
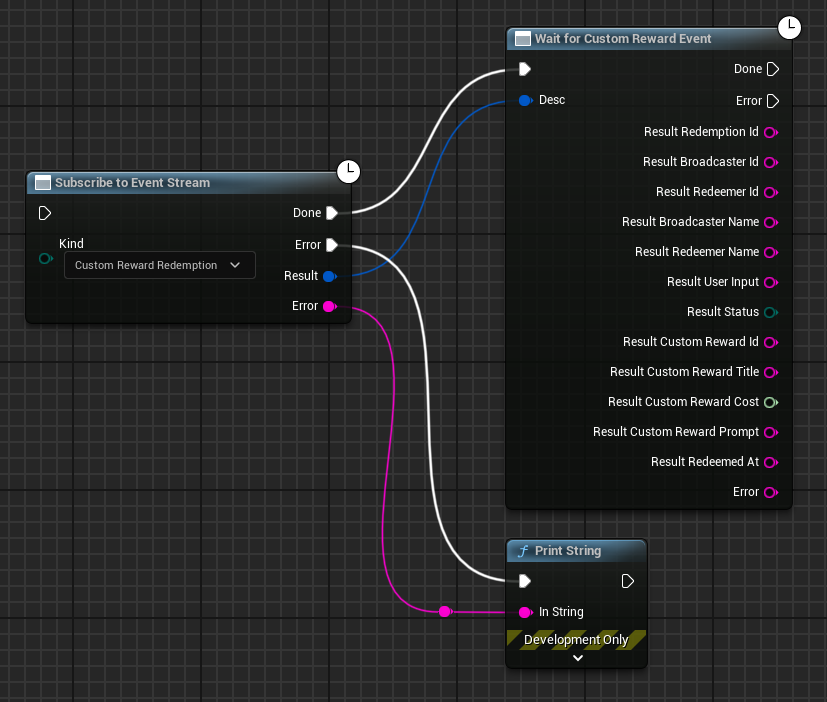
Step 2 is subscribing to the event itself. This can be done via the Subscribe To Event Stream node and setting the Kind to type Custom Reward Redemption, pull off the Result pin of the subscribe node and pass that to Wait for Custom Reward Event.
Now you are able to trigger in-game events via channel points rewards.
Step 2 Example:
Subscribe to Follows
This requires the user to be logged in and the appropriate scope.
Follow events are part of the event system on Twitch and as such follow a very similar structure to other events inside of the plugin.
First call the Subscribe to Event Stream node with a Kind type of follow.
Pull off the result pin and call Wait for channel follow event, note that both Subscribe to Event stream and Wait for Channel follow event are asynchronous (aka latent) functions which are demarcated in the blueprint with a clock.
This will return an object which contains information about the user who followed.
Example Blueprint:

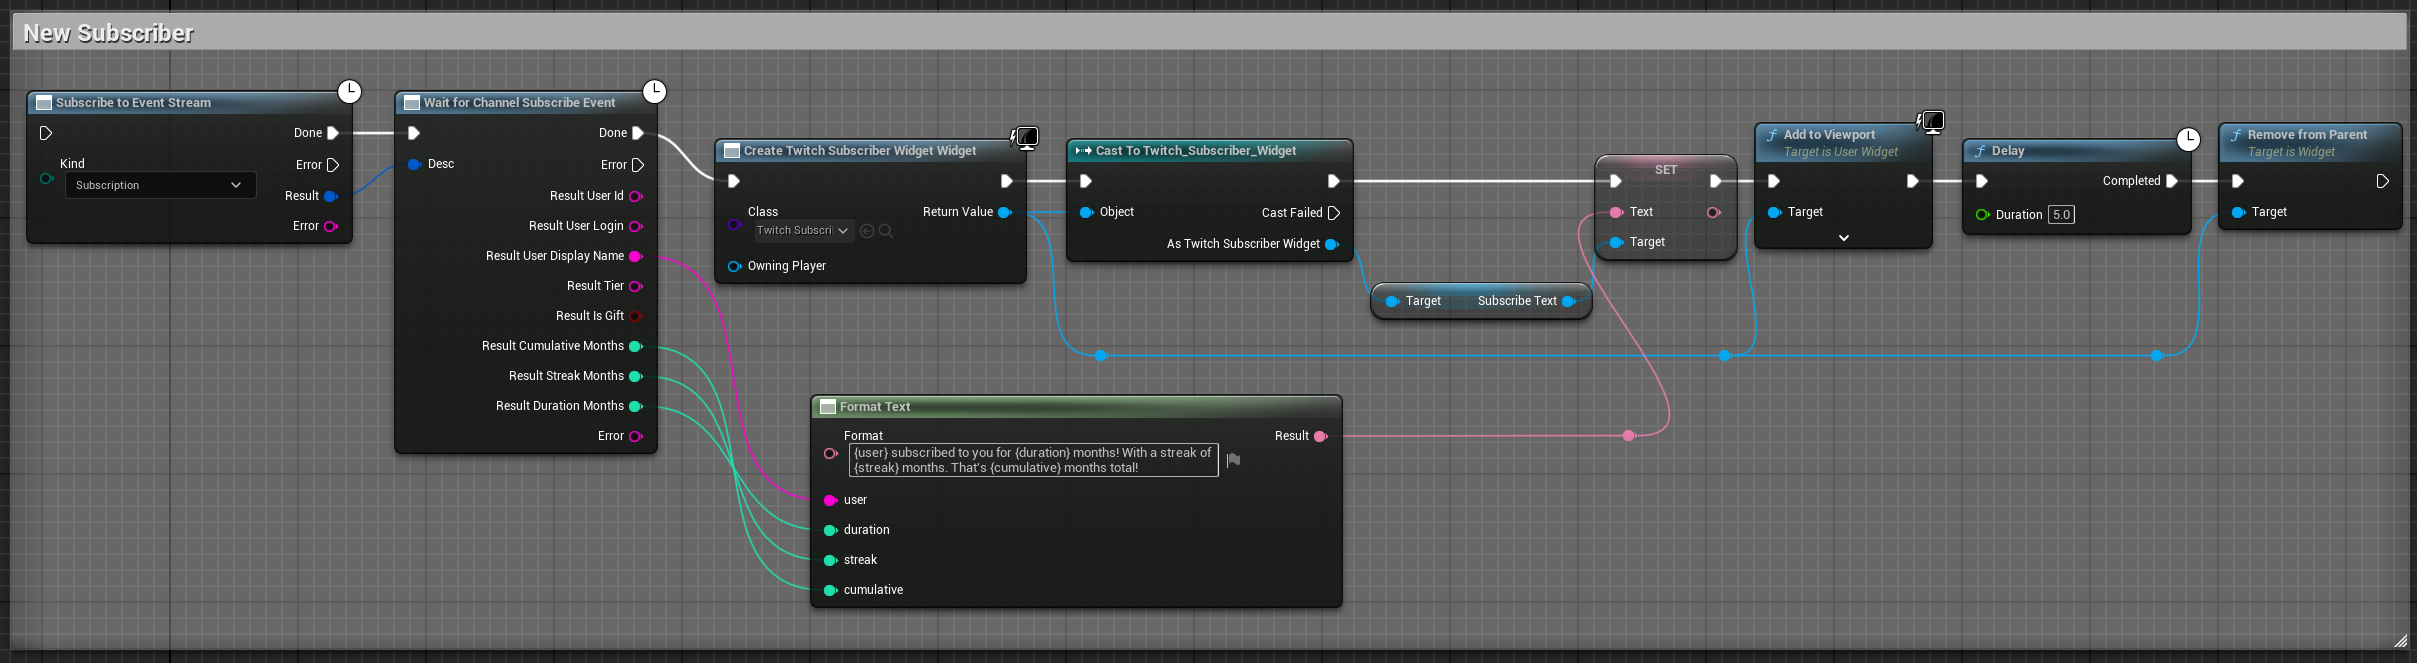
Subscribe to Subscribers
This requires the user to be logged in and the appropriate scope
Subscriber events are part of the event system on Twitch and as such follow a very similar structure to other events inside of the plugin.
First call the Subscribe to Event Stream node with a Kind type of Subscription.
Pull off the result pin and call Wait for channel subscribe event, note that both Subscribe to Event stream and Wait for Channel subscribe event.
This will return an object which contains information about the user who subscribed.
Example Blueprint: