Get started with Twitch Extensions
Reviews for chatbot verification continue to be temporarily paused while we revise our processes. Reviews for Extensions, developer organizations, and game ownership have resumed. Thank you for your patience and understanding.
As of July 9th 2024, there is no longer a requirement to have an Apple Developer account, or fill out the "iOS Allowlist Request" form, to allow an Extension to work on the iOS version of the Twitch app. All mobile Extensions, existing and new, are available on iOS and Android without additional requirements in the submission process.
What is a Twitch Extension?
A Twitch Extension is a webpage that sits inside Twitch and communicates with Twitch to provide extra functionality. For example, the Hearthstone Deck Tracker extension adds an interactive overlay allowing viewers to browse through the cards the streamer is using and their effects.
Twitch Extensions can appear in one of three views:
- Panel Extension - Displays in a box under the video.
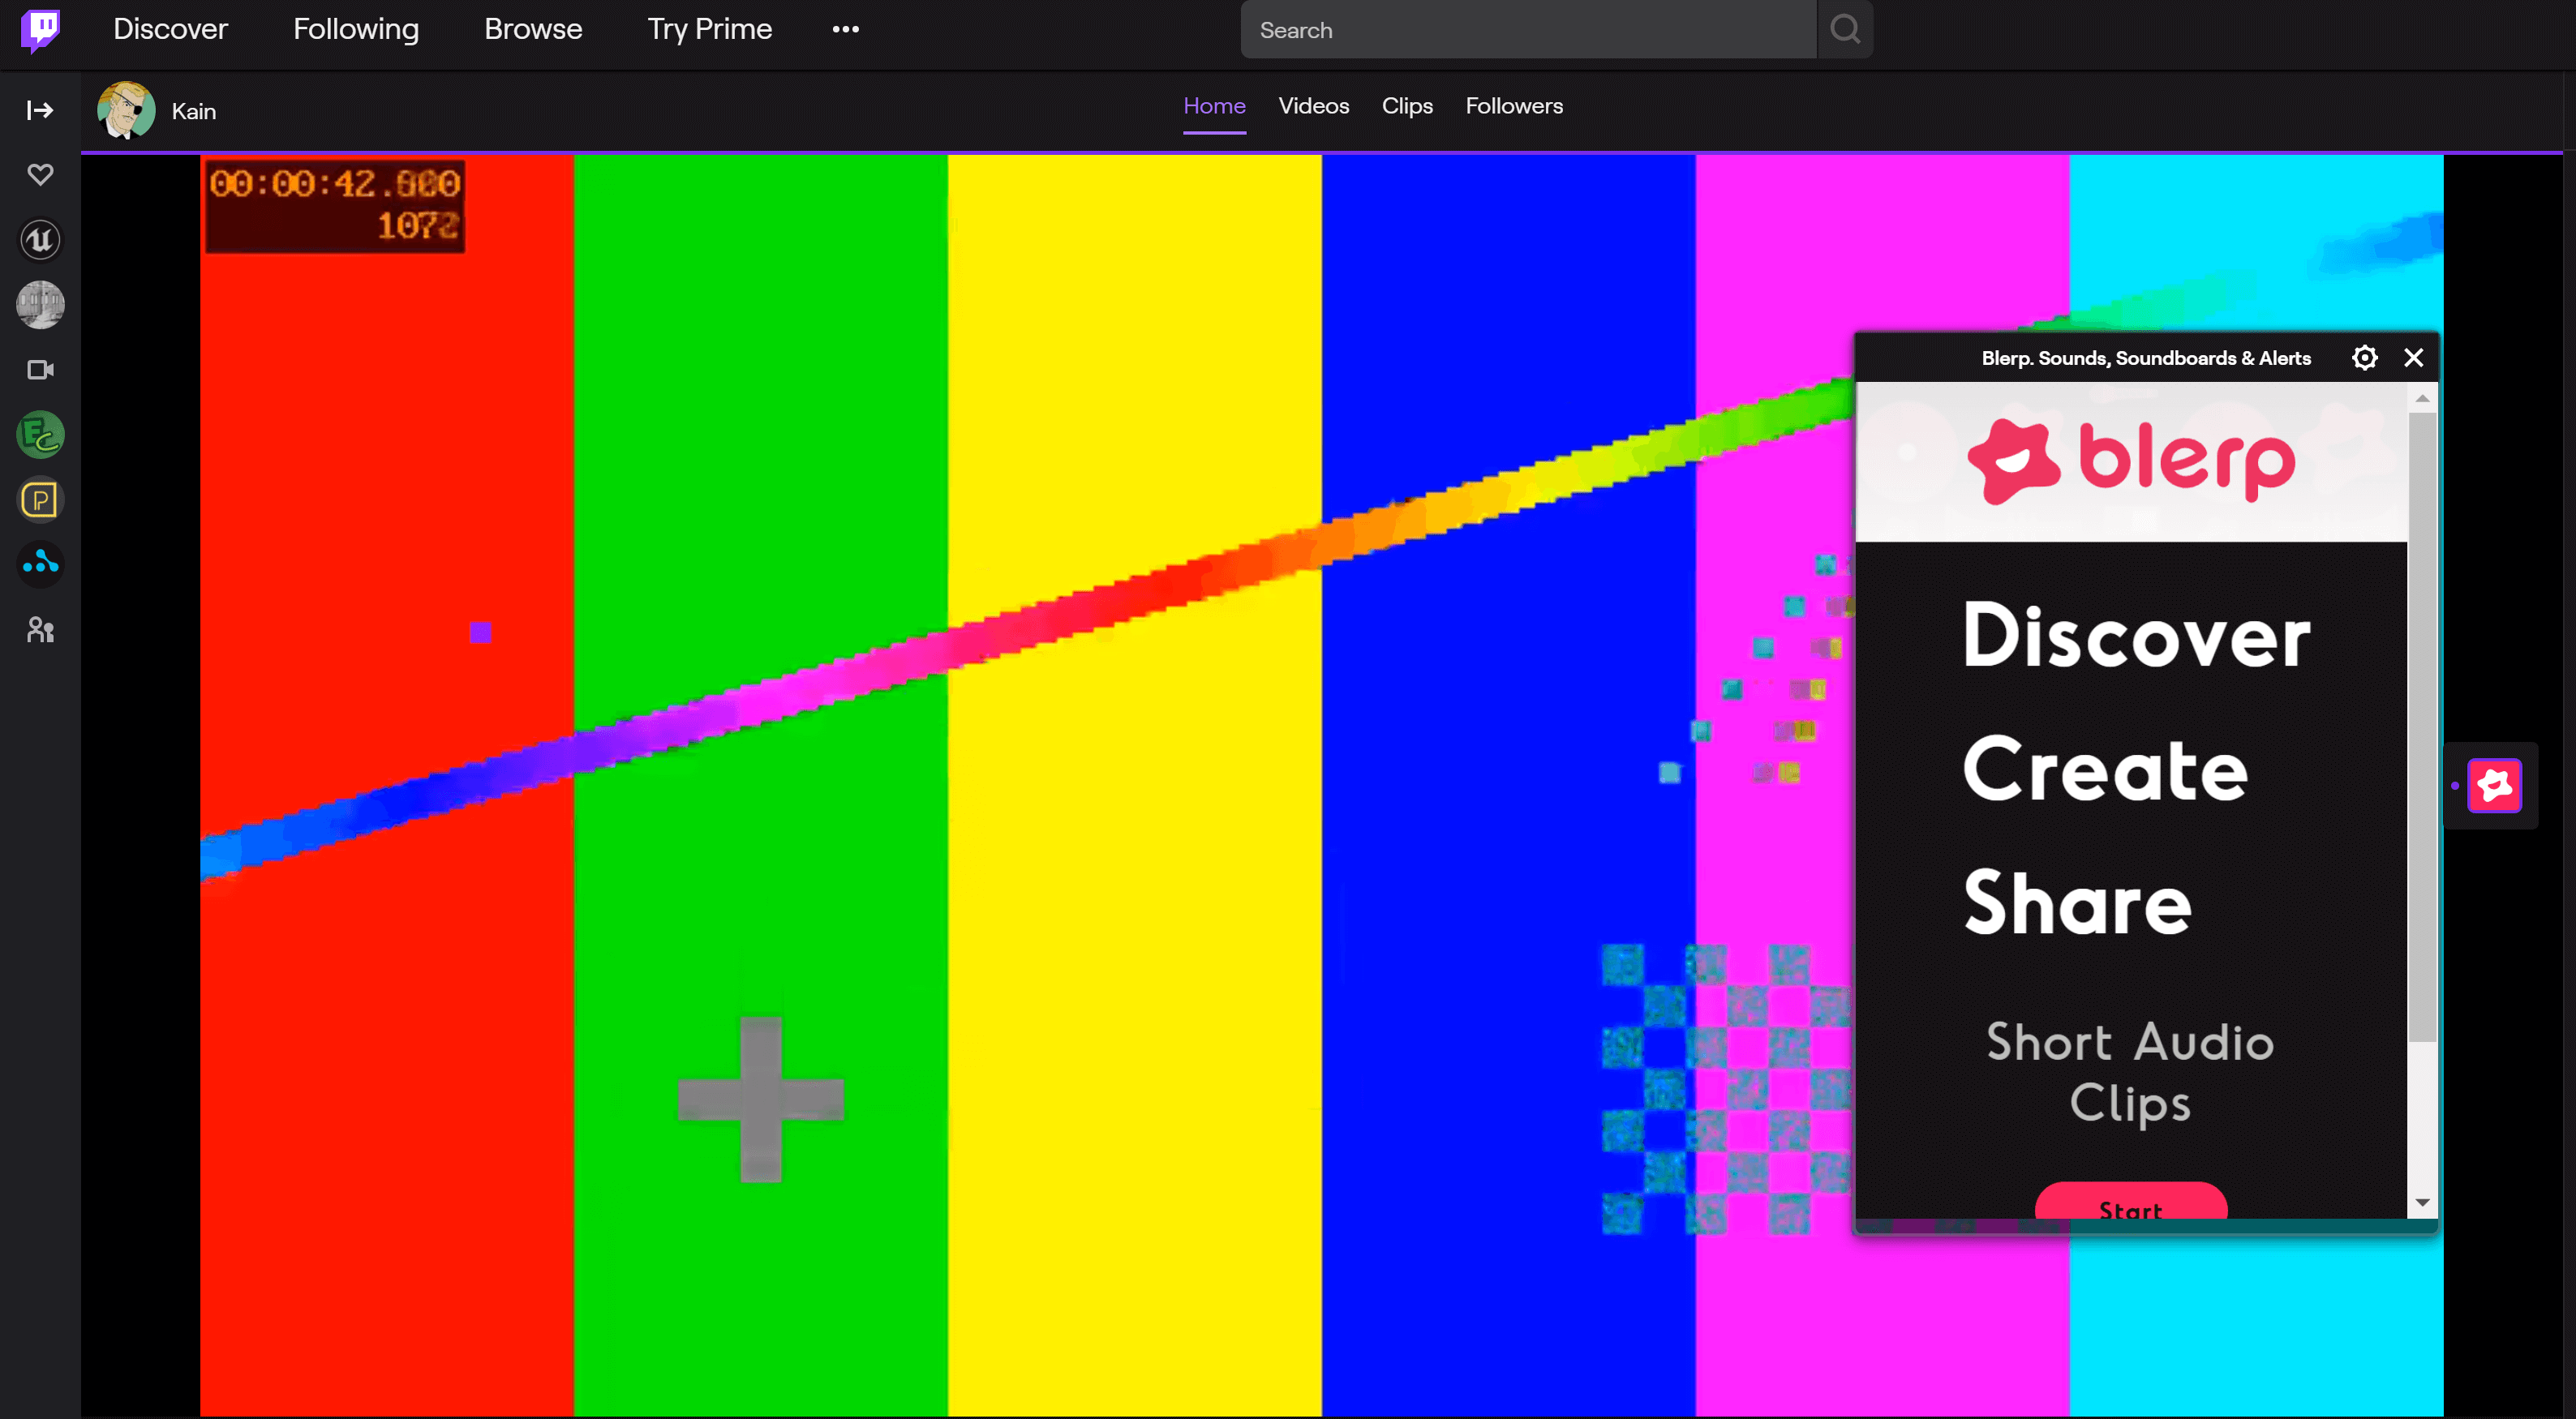
- Overlay Extension - Displays on top of the whole video as a transparent overlay.
- Component Extension - Displays as part of the video, taking up part of the screen. Component Extensions can be hidden by viewers.
How do Extensions work?
A Twitch Extension sits in a specially sandboxed iframe inside Twitch and communicates with its parent via postMessage. We handle all the nitty-gritty of forming these messages, and provide a Javascript API to the extension called the Extension Helper. This is a high level API allowing the extension to request things like user identity and chat.
%% Extensions Overview Diagram
graph LR
    Twitch --> | - postMessage - | Extension
    Extension --> | - postMessage - | Twitch
    Extension --> | - HTTP - | APIs
    Extension --> | - HTTP - | EBS[Extension Backend]
    Identity --> Twitch
    Chat --> Twitch
    Memes --> Twitch
What can I do with an Extension?
Being a webpage, an extension can do almost anything you can already do on the web, such as play sounds and show video. We provide some special functionality for you including:
| User | Stream |
|---|---|
| [Posting in Chat] | [Read Information about the Game and Video] [Twitch.ext.onContext] |
| [Follow Channels][Twitch.ext.actions.followChannel] | [Get the user’s Language] [Client Query Parameters] |
| [Get Subscription Status][isSubscriptionStatusAvailable] | |
| [Microtransactions] |
Build your first Extension
It’s easier than you might think to make a simple Twitch Extension. Extensions are simply webpages, and the only basic requirement is to import the Extension Helper.
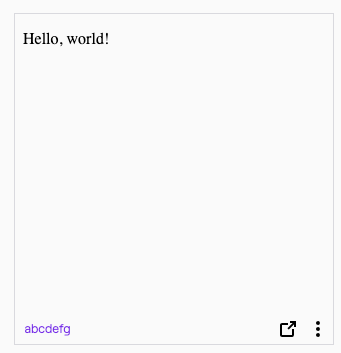
Here’s an extension that just says ‘Hello, world!’:
<!DOCTYPE HTML>
<title>Hello World!</title>
<p>Hello, world!</p>
<script src="https://extension-files.twitch.tv/helper/v1/twitch-ext.min.js"></script>

<!-- index.html -->
Configure the Extension
Configuring an Extension requires a few steps:
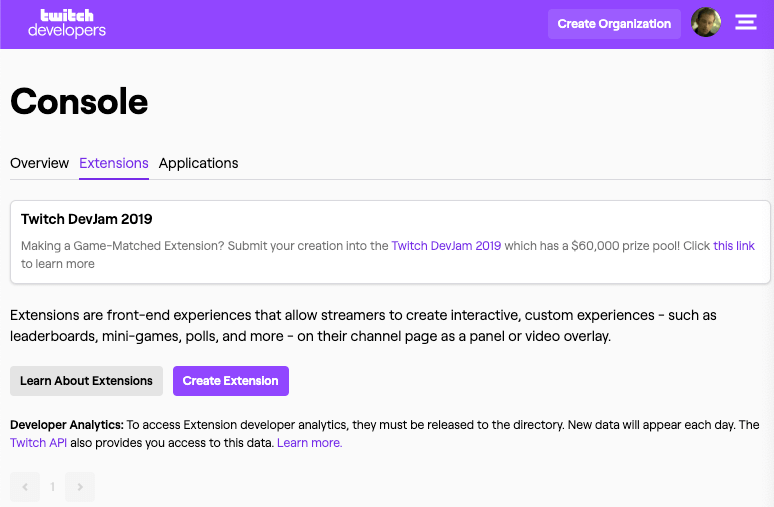
-
Visit https://dev.twitch.tv/console/extensions, and click Create Extension.
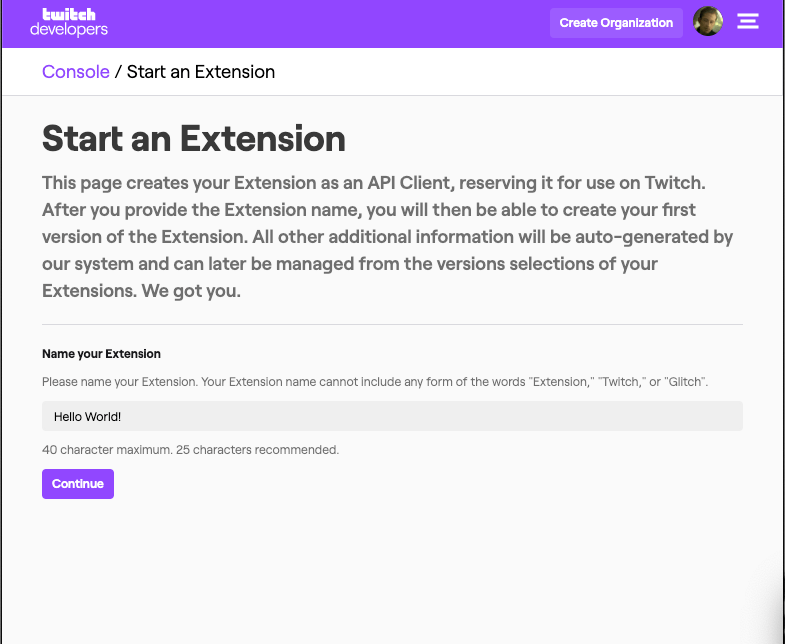
-
Type a unique name for your new Extension.
 |
- Pick a type for your Extension. For this example, we’ll use a Panel Extension.
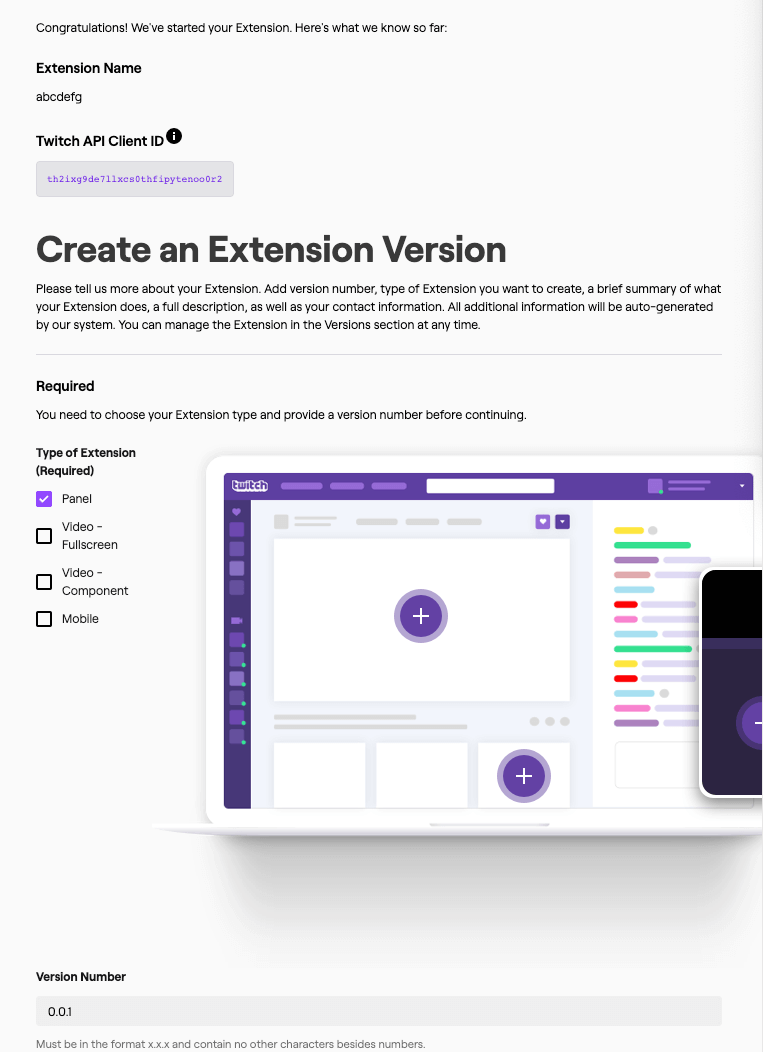 |
- Fill in any optional fields you choose.
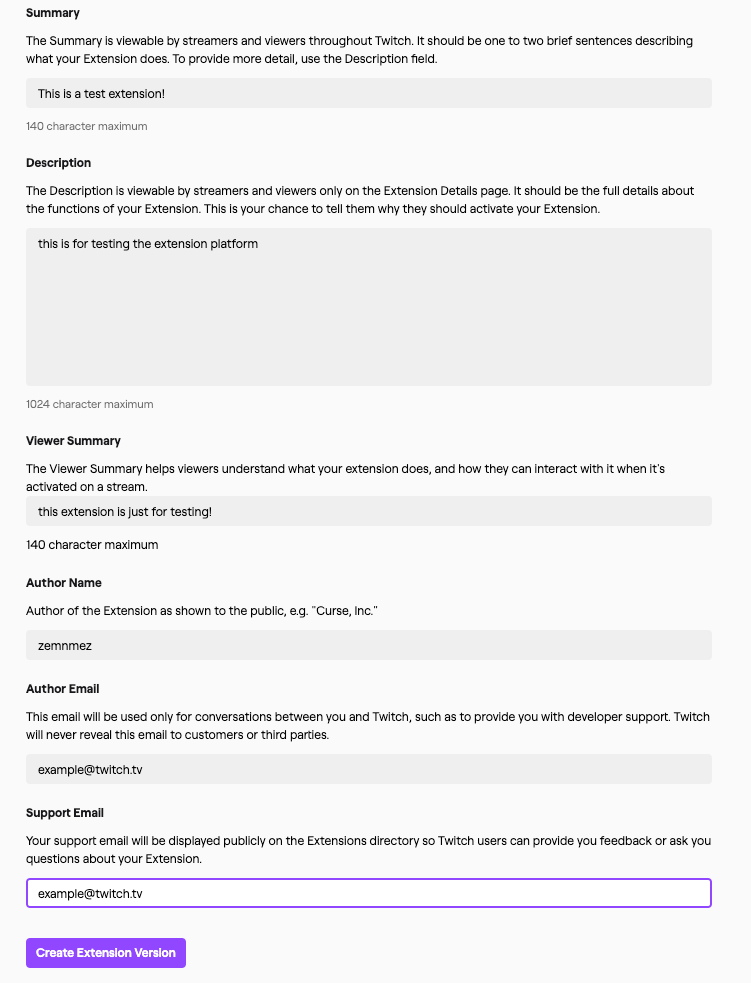 |
- After filling in the optional fields, click Create Extension Version. You now have an extension!
- Click View on Twitch and Install to add your extension to your channel. The config window should be blank.
- Close the config window and click the Activate button on your extension. Choose a slot for the extension. Now it’s added to your channel!
Extensions needs to know what the starting point is for your panel. Set the Panel Viewer Path to index.html (the name of our panel HTML file).
 |
Package your Extension
When you send Twitch an Extension, you need to bundle the Extension files into a zip file. Make sure you are bundling the files, not the folder containing your Extension files.
To upload your zip file to Twitch, choose Files > Upload Version in Assets > Choose File. Then click the purple Upload button at the bottom.
Now we’re ready to move to Hosted Test. Click Next Step in the top right, click Move To Hosted Test, and confirm your choice.
If you go to your Twitch channel now, you’ll see your Extension!
Unless you’re in dark mode, in which case the black text won’t show up against the black background. To fix that, repeat the previous steps, this time changing the text color.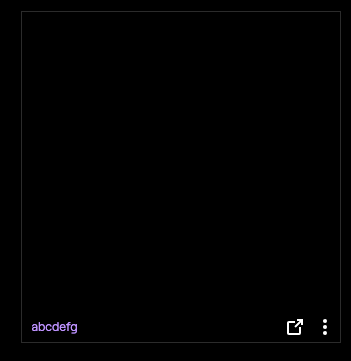
Develop your Extension
The easiest way to develop your extension is probably to use the Local Test function. This points Twitch Extensions to your local computer, letting you develop and update Extensions on the fly, while seeing the results in Twitch.
By default, your base URI, where we look for the extensions files, is set to https://localhost:8080/. Note the https in this URL. Because Twitch is served over HTTPS, your browser will reject the extension unless it’s also served over HTTPS. Depending on your operating system, convincing your browser your extension is safe can be a bit tricky.
HTTPS on localhost: the easy way
Technically speaking, HTTPS doesn’t make a lot of sense when it comes to loading your local extension. HTTPS encrypts information in transit as it goes over the internet and makes it secure, but if you’re just communicating from your local machine to your local machine there’s not really anyone who could intercept and decrypt it. As a result, a few browsers either accept locally hosted content as though it were HTTPS, or have a flag to do so.
We recommend using Google Chrome. In the browser, enable the flag allow insecure localhost. To enable this flag, navigate to: chrome://flags/#allow-insecure-localhost and restarting your browser.
Once you have restarted your browser, open an HTTP server on localhost:8000, and change the base URI.
An easy way to launch an HTTP server in the folder your index.html is in is to use Python:
python3 -m http.server
Then, change your base URI in the Asset Hosting page of your control panel from https://localhost:8080 to http://localhost:8080.
Now you can skip over the hard way and congratulate yourself on a job well done.
HTTPS on localhost: the hard way
We recommend using a tool called mkcert, which will create and install an HTTPS certificate. After you install mkcert, generate a certificate for HTTPS:
# if you have the Go programming language installed, you
# can replace 'mkcert' in the following line with go run github.com/FiloSottile/mkcert
# to automatically download, install and run it.
mkcert -install localhost
# > The certificate is at "./localhost.pem" and the key at "./localhost-key.pem"
Use this certificate to start a server. With Python installed, create a server.py in the same folder as your index.html:
#!/usr/bin/env python3
import http.server
import ssl

cert_file = "./localhost.pem"
key_file = "./localhost-key.pem"


class RequestHandler(http.server.SimpleHTTPRequestHandler):
    def end_headers(self):
        self.send_header("Cache-Control", "no-cache, no-store, must-revalidate")
        self.send_header("Pragma", "no-cache")
        self.send_header("Expires", "0")
        super().end_headers()


httpd = http.server.HTTPServer(
    ('', 8080),
    RequestHandler
)

ssl_context = ssl.SSLContext(ssl.PROTOCOL_TLS_SERVER)
ssl_context.load_cert_chain(certfile=cert_file, keyfile=key_file)
httpd.socket = ssl_context.wrap_socket(httpd.socket, server_side=True)

httpd.serve_forever()
Now run:
python server.py
Congratulate yourself
Whether you did it the easy way or the hard way, you got your server started. Now, move back to local test to have the development version show up: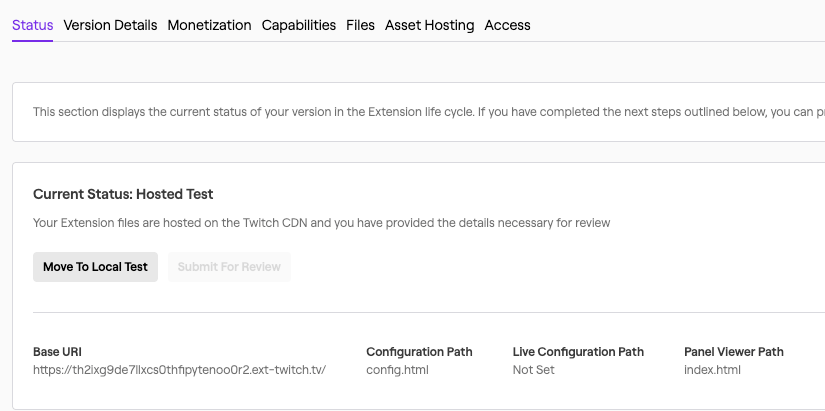
When you load your page you should see what you saw before:
To be sure, edit the page and then refresh. You can also click the little arrow icon to pop it out to just focus on the extension.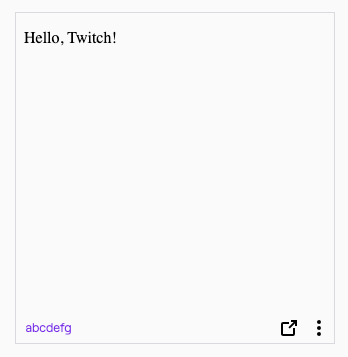
Stories
Build an Extension with Create React-App
Since extensions are such front-end heavy applications, it’s common to use modern frontend libraries like React. While these instructions are specific to React, they should extrapolate to other similar frameworks. For this section, please already have extension set to Local Test.
All you need to start is a working yarn installation, then you can run create-react-app:
yarn create-react-app example-extension
This should take a little while as React gets your development environment set up.
If you’re unfamiliar with create-react-app, it might be worth running yarn start in the directory yarn created. This will launch a server based on the react code in src/. Any code changes in src/ will cause live changes to the page create-react-app just opened. You’ll want to close it before continuing to the next steps.
There are two things we need to do to make this work with Extensions. First, we need to add the Extension Helper, then we need to add HTTPS support to our create-react-app install.
To add the Extension Helper, just add the extension helper script to public/index.html between <body> tags:
<!-- ... -->
  <body>
    <script src="https://extension-files.twitch.tv/helper/v1/twitch-ext.min.js"></script>
<!-- ... -->
  </body>
<!-- ... -->
Next, set up HTTPS. You can avoid this step in Google Chrome by setting a flag as described previously. If you do that, you can run yarn start now.
You’ll find install instructions for mkcert on its Github page.
Save the following script as install_cert.sh:
#!/usr/bin/env bash
mkcert -install \
    -cert-file cert.pem \
    -key-file key.pem \
    localhost
cat cert.pem key.pem > node_modules/webpack-dev-server/ssl/server.pem
rm cert.pem key.pem
Next, make some modifications to package.json to:
- Run this script to configure HTTPS for anyone who uses your project.
- Require HTTPS on start.
Modify the scripts part of your package.json to modify start and add postinstall as shown:
// ...
  "scripts": {
    "start": "HTTPS=true PORT=8080 react-scripts start",
    "build": "react-scripts build",
    "postinstall": "sh install_cert.sh"
// ...
Note that PORT=8080 changes the server to be served at https://localhost:8080, the default is https://localhost:3000. You can omit this, but you’ll need to change your Base URI.
Finally, run yarn postinstall to install your certificates, and yarn start to start the server.
With your server started, check out your cool new react extension!
Google Analytics
Use of Google Analytics is allowed in a Twitch Extension. However, due to restrictions on content, it must be included as a javascript file.
Typically, your Google Analytics snippet will look like this:
(function(i, s, o, g, r, a, m) {
    i['GoogleAnalyticsObject'] = r;
    i[r] = i[r] || function() {
        (i[r].q = i[r].q || []).push(arguments)
    }, i[r].l = 1 * new Date();
    a = s.createElement(o), m = s.getElementsByTagName(o)[0];
    a.async = 1;
    a.src = g;
    m.parentNode.insertBefore(a, m)
})(window, document, 'script', 'https://www.google-analytics.com/analytics.js', 'ga');
ga('create', 'UA12345678', 'auto');
ga('set', 'anonymizeIp', true);
| Note: If you attempt to store or process any of this data, you will need to be compliant with European GDPR law about capturing IP address information. |
With an Extension, you just need to add this to a file and import it. For example, if you had this saved as analytics.js, you might import it into your page with <script src="analytics.js"></script>.
If you’re using a more elaborate Javascript setup with a bundler, you can add it to any of your Javascript, such as src/App.js.
The Google Analytics script just inserts a <script async='https://www.google-analytics.com/analytics.js'></script>. You might wish to add this to your HTML directly, and instead call the ga() functions in your own javascript bundle.
Google WebFonts
Typically, an extension cannot load fonts outside of a Twitch Extension. This helps to prevent sneaky font attacks.
However Google WebFonts is allowed. Both of the forms allowed by Google WebFonts will work:
<link href="https://fonts.googleapis.com/css?family=Roboto&display=swap" rel="stylesheet">
@import url('https://fonts.googleapis.com/css?family=Roboto&display=swap');
Pushing announcements to Extensions
Twitch Extensions can use PubSub to push out real time notifications to all extensions at once. This is a robust service based on the same technologies as Twitch Chat.
Architectural Reference
Configuration
Bits Support
The Bits Support config allows this extension to use APIs to request bits from the user via the Twitch.ext.bits Javascript APIs.
Base URI
The Base URI is the location of the folder containing your extension used in local testing. When an extension in testing loads, the Base URI is combined with the Panel Viewer Path, or Config Path, to work out where to load your web content from. Unlike a web origin it must end with /.
For example, if loading a Panel Extension in testing with Base URI https://localhost:8080/ and Panel Viewer Path index.html?view=panel, the Extension will load https://localhost:8080/index.html?view=panel.
Panel Viewer Path
The Panel Viewer Path is the path that will be loaded when a Panel Extension is loaded. It is combined with the Base URI to decide what location to load an extension from when an extension is in Local Test.
Panel Height
The Panel Height is the height in pixels of this extension when displayed as a Panel Extension on a broadcaster’s channel.
Config Path
The Config Path is the path that will be loaded when the config for an extension is shown to a broadcaster. It is combined with the Base URI to decide what location to load when an extension is in Local Test.
Live Config Path
The Live Config Path is the path that will be loaded when the extension is viewed from the Live module of the Twitch Dashboard. The streamer can then take actions via this page without leaving their dashboard. It is combined with the Base URI to get the full URL to load when an extension is in Local Test.
Type of Extension
The Type of Extension configuration field allows you to select how you want your Extension to be displayed. If an Extension type is not picked here, a user of your Extension will not be able to use it in that way. For example, if the ‘Panel’ Extension type is not picked, a user of this extension will not be able to activate it as a Panel Extension.
Identity
Opaque Identifier
Initially, an extension does not have access to the identity of the user that is using it. Twitch.ext.onAuthorized will return a special kind of userId called an Opaque Identifier. Opaque Identifiers come in two types:
| Type | State | Persistent across sessions? |
|---|---|---|
| Anonymous | User is logged out of Twitch | No |
| Unauthorized | User is logged into Twitch | Yes |
If a user is logged into Twitch, you will get an opaque userId starting with U-. This allows you to uniquely identify the user across sessions even before knowing who they are, but does not disclose their identity.
If the user is not logged into Twitch, you will get a userId starting with A-. This identifier will change between sessions.
Extension Types
Panel Extension
A Panel Extension sits with the rest of the user profile content at the bottom of a Twitch channel.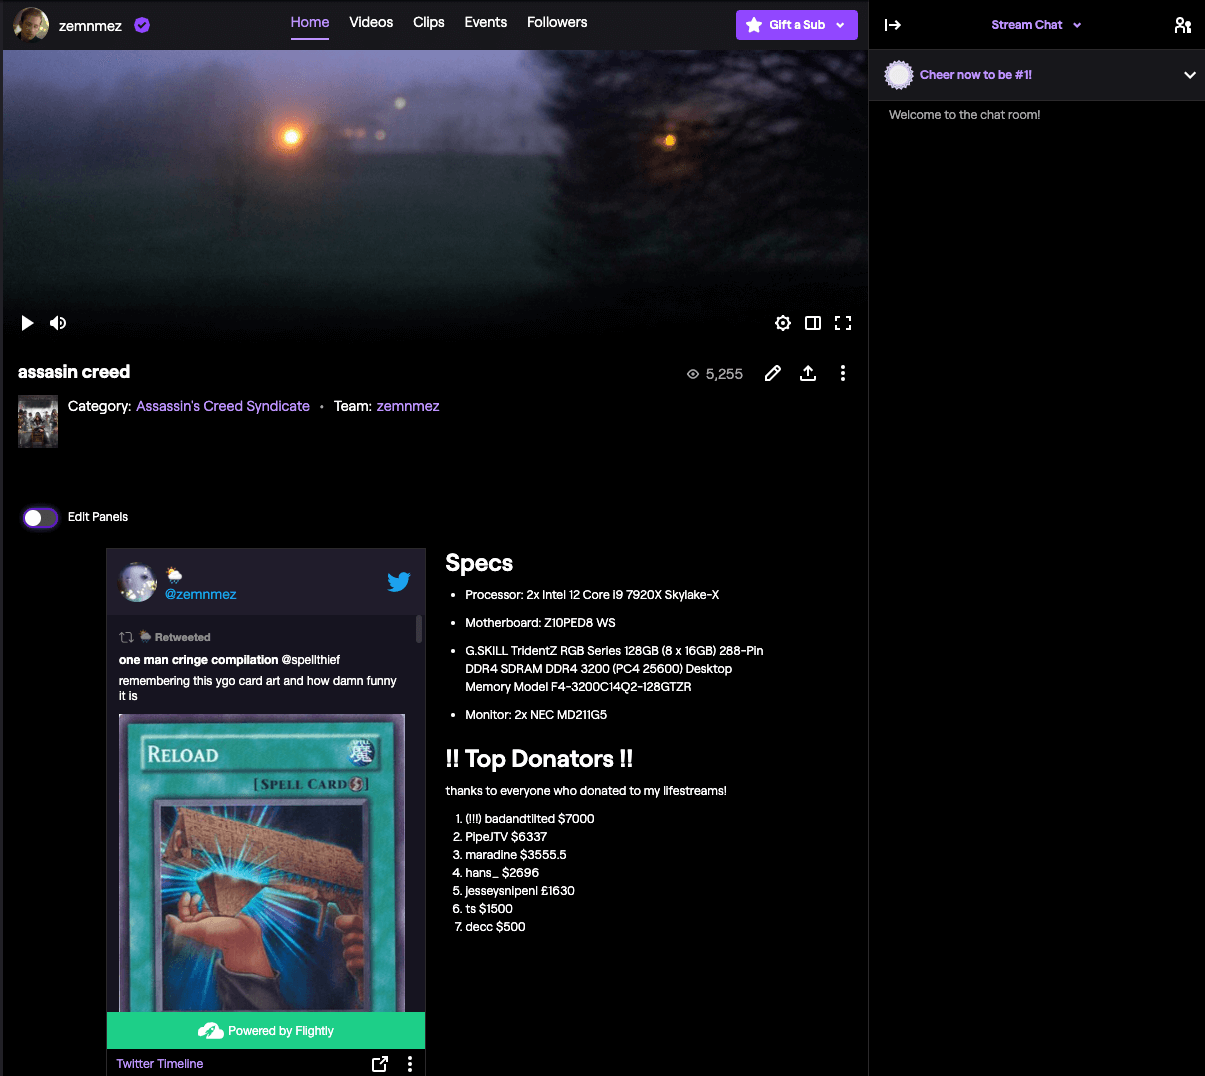
Overlay Extension
An Overlay Extension displays on top of the whole video as a transparent overlay.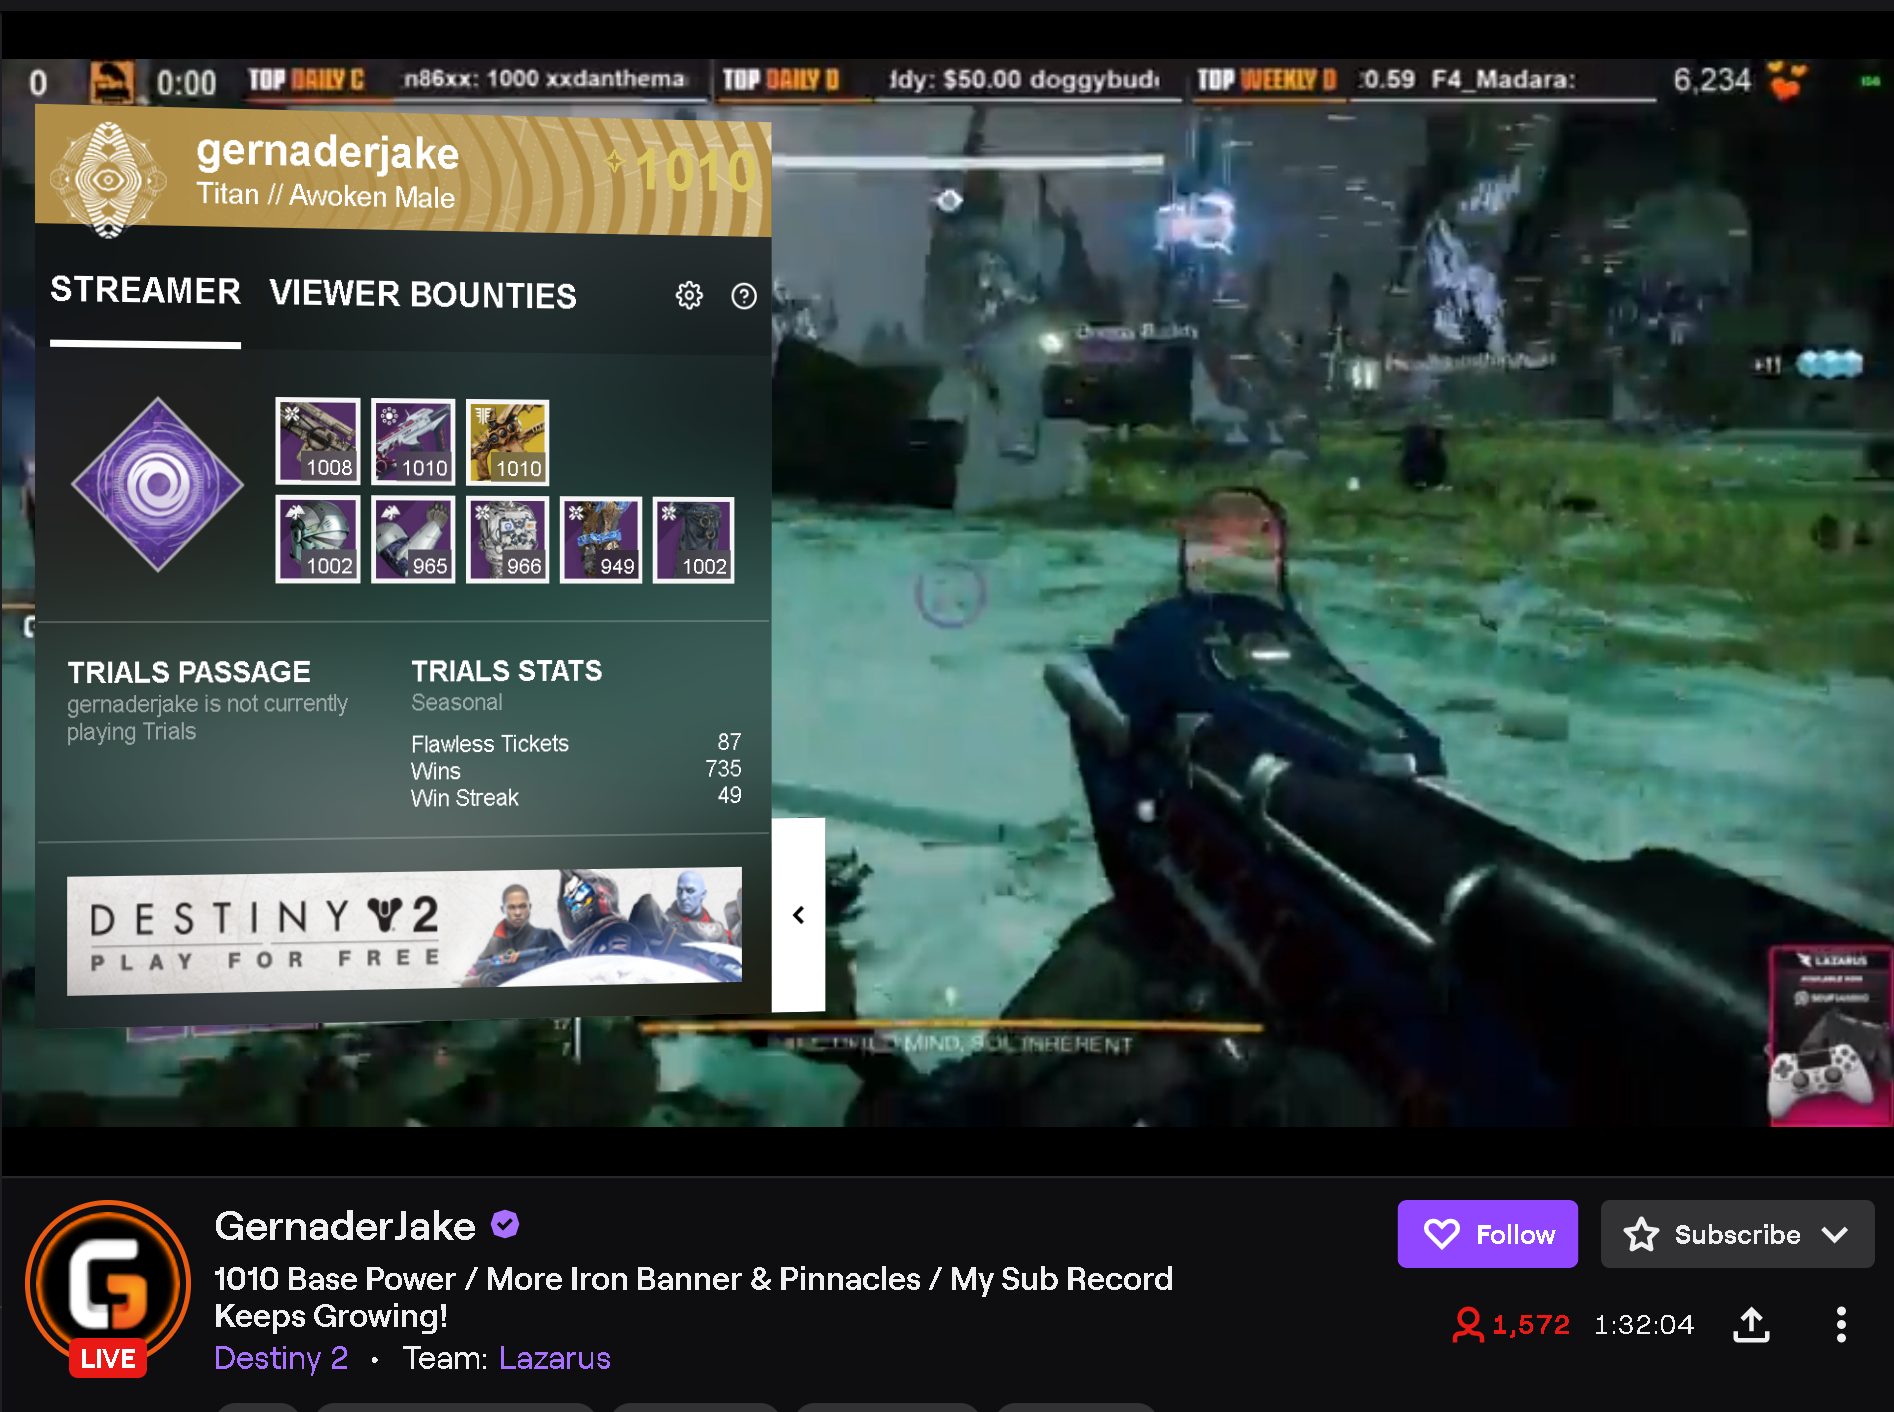
Component Extension
A Component Extension displays as part of the video, taking up part of the screen. Component Extensions can be hidden by viewers.
Extension Helper
The Extension Helper is a Javascript library that runs inside an extension. Without it, an extension will not work. It exposes a Javascript API that can perform actions not normally accessible through our web APIs.
Security Model
The Extensions system deploys heavy sandboxing and Content Security Policy constraints to make it extremely hard to abuse an Extension. These elements make up the extensions Security Model.
%% Security Model Diagram
graph LR
    Twitch[Twitch.tv] --> | embeds | Supervisor[Extension Supervisor]
    Supervisor -->  | embeds | Extension[Twitch Extension]
ext-twitch.tv
%% ext-twitch.tv
graph TD
    ext-twitch.tv --> my-extension.ext-twitch.tv
    ext-twitch.tv --> your-extension.ext-twitch.tv
ext-twitch.tv is the host for all Extensions. For historical reasons, subdomains of a domain like myextension.twitch.tv are given certain access rights over twitch.tv. For example, due to historical Cookie Security policies, myextension.twitch.tv can add cookies to twitch.tv, potentially overwriting a user’s existing session.
For this reason, Twitch Extensions are all based on ext-twitch.tv. This causes the web browser to treat twitch Extensions as entirely separate to twitch.tv itself.
ext-twitch.tv is also the host of the Extension Supervisor, which embeds the extensions themselves.
Extension Supervisor
The Extension Supervisor is located at supervisor.ext-twitch.tv. When an Extension loads in Twitch, Twitch embeds the Extension Supervisor and sends a message to the supervisor indicating what extension to load.
The supervisor generates a Content Security Policy frame-src directive that prevents the Extension from loading anything other than the Extension, and then embeds the Extension itself as an iframe.
This prevents bad actors from making an Extension load content which isn’t vetted by the Extensions Review Process.
Restrictions on content
| Content Type | Policy Name | Allowed |
|---|---|---|
| Default | default-src |
✅ The Extension’s files and the Extension Helper |
| Images | img-src |
✅ The Extension’s files ✅ The “Allowlist for Image Domains” specified in the developer console. ✅ Google Analytics |
| Sound and video | media-src |
✅ The Extension’s files ✅ The “Allowlist for Media Domains” specified in the developer console. |
| Remote content | connect-src |
✅ The Extension’s files ✅ The Twitch API ✅ Twitch PubSub ✅ The “Allowlist for URL Fetching Domains” specified in the developer console. ✅ Google Analytics |
| Styles | style-src |
✅ <style> tags and inline style= attributes✅ The Extension’s files ✅ Google WebFonts |
| Fonts | font-src |
✅ The Extension’s files ✅ Google WebFonts |
| Scripts (JavaScript) | script-src |
✅ The Extension’s files ✅ The Extension Helper ✅ Google Analytics |
| Insecure content | block-all-mixed-content |
❌ |
| Embedded iframe content | frame-src |
❌ |
A Content Security Policy is a set of protocols that help prevent bad actors from compromising web content. Twitch Extensions’ policy specifies what kind of content can be loaded and from where. Since a bad actor’s goal is usually to inject their own code, the policy prevents nearly all cross-site scripting and redress attacks.
The Content Security Policy is dynamically constructed for each Extension and includes the allowlists provided in the developer console configuration. Below is a CSP example that could be expected for an Extension. Line spacing has been used instead of semicolons for readability.
NOTE: You must use the Developer Console to configure your extension’s Content Security Policy. You may not configure the policy using tags in your extension’s HTML files.
content-security-policy:
  default-src 'self' https://<extension_id>.ext-twitch.tv

  block-all-mixed-content

  img-src 'self' https://<extension_id>.ext-twitch.tv <allowlist> https://www.google-analytics.com data: blob:

  media-src 'self' https://<extension_id>.ext-twitch.tv <allowlist> data: blob:

  frame-ancestors https://supervisor.ext-twitch.tv https://extension-files.twitch.tv https://*.twitch.tv https://*.twitch.tech https://localhost.twitch.tv:* https://localhost.twitch.tech:* http://localhost.rig.twitch.tv:*

  font-src 'self' https://<extension_id>.ext-twitch.tv https://fonts.googleapis.com https://fonts.gstatic.com

  style-src 'self' 'unsafe-inline' https://<extension_id>.ext-twitch.tv https://fonts.googleapis.com

  connect-src 'self' https://<extension_id>.ext-twitch.tv https://api.twitch.tv wss://pubsub-edge.twitch.tv <allowlist> https://www.google-analytics.com https://stats.g.doubleclick.net

  script-src 'self' https://<extension_id>.ext-twitch.tv https://extension-files.twitch.tv https://www.google-analytics.com
The following sections discuss each of these directives in further detail.
Default restrictions on content
default-src is a Content Security Policy directive that is used as a fallback for all content that doesn’t have a specific policy associated with it. For a Twitch Extension, this is the Extension’s own origin. That is, where there is no other specific policy, an Extension may only load its own files.
Restrictions on images
img-src is a Content Security Policy directive that restricts where images can load from. In the case of Extensions, this is set to 'self', https://<extension_id>.ext-twitch.tv, https://www.google-analytics.com, and the “Allowlist for Image Domains” specified in the developer console.
Restrictions on media
media-src is a Content Security Policy directive that restricts where media, such as audio and video, can load from. In the case of Extensions, this set to 'self', https://<extension_id>.ext-twitch.tv, and the “Allowlist for Media Domains” specified in the developer console.
Restrictions on fonts
font-src is a Content Security Policy that restricts where fonts can load from. In the case of Extensions, this is set to 'self', https://<extension_id>.ext-twitch.tv, https://fonts.googleapis.com, and https://fonts.gstatic.com.
Restrictions on style
style-src is a Content Security Policy directive that restricts where style information can load from. In the case of Extensions, this is set to 'self', 'unsafe-inline', https://<extension_id>.ext-twitch.tv and https://fonts.google.com. This means that styles such as CSS can be loaded from the Extension’s own files, Google WebFonts, and inline within HTML tags.
Restrictions on Javascript HTTP requests
connect-src is a Content Security Policy directive that restricts what URLs can be used to fetch data. In the case of Extensions, this is set to 'self', https://<extension_id>.ext-twitch.tv, https://api.twitch.tv, wss://pubsub-edge.twitch.tv, https://www.google-analytics.com, https://stats.g.doubleclick.net, and the “Allowlist for URL Fetching Domains” specified in the developer console.
Restrictions on scripts
script-src is a Content Security Policy directive that restricts where scripts such as JavaScript can load from. In the case of Extensions, this is set to 'self', https://<extension_id>.ext-twitch.tv, https://extension-files.twitch.tv, and https://www.google-analytics.com. This means that an Extension can only load scripts from itself, https://extension-files.twitch.tv (where the Extension Helper is located), and Google Analytics.
Restrictions on Iframes
frame-src is a Content Security Policy directive that restricts what pages can be embedded in a webpage. In the case of Extensions, the Extension Supervisor sets a frame-src that prevents anything but the Extension itself being embedded.
Restrictions on browser APIs
| Action | Policy Name | Allowed |
|---|---|---|
| HTML Forms | allow-forms |
✅ |
| Popup windows (of webpages) | allow-popups |
✅ |
| Unsandboxed popups | allow-popups-to-escape-sandbox |
✅ |
| Run Scripts | allow-scripts |
✅ |
| Have own web origin† | allow-same-origin |
✅ |
| Downloads without user interaction | allow-downloads-without-user-activation |
❌ |
alert(), prompt(), print(), confirm(), other modals |
allow-modals |
❌ |
| Lock the orientation of the screen | allow-orientation-lock |
❌ |
| Lock the pointer to the extension | allow-pointer-lock |
❌ |
| Start a presentation session | allow-presentation-session |
❌ |
| Access Twitch cookies with user confirmation | allow-storage-access-by-user-activation |
❌ |
| Navigate Twitch to somewhere else | allow-top-navigation |
❌ |
| Navigate Twitch to somewhere else, if the user clicks a link | allow-top-navigation-by-user-activation |
❌ |
† allows the Extension to load its own content, use CORS, and set and read cookies amongst other things.
Extensions use iframe sandboxing to prevent Extensions messing with Twitch without permission. This includes opening popups that might appear to be from Twitch, locking the cursor to the Extension amongst other things. The current sandbox configuration is:
allow-forms allow-scripts allow-same-origin allow-popups allow-popups-to-escape-sandbox